Welcome, fellow food enthusiasts and culinary adventurers! As a seasoned SEO expert and content creator, I’ve spent countless hours dissecting the intricacies of online visibility and, by extension, the art of presenting information clearly and engagingly. Today, however, our focus shifts from algorithms to appetites, from keywords to crunch. We’re about to embark on a journey towards the zenith of poultry perfection: the ultimate crispy baked chicken leg.
Forget deep-frying, with its oil splatters and dietary guilt. Cast aside the notion that truly crispy chicken is a restaurant-only fantasy. We are here to demystify the process, to equip you with the knowledge and techniques to consistently achieve chicken legs that boast a skin as shatteringly crisp as a winter morning’s frost and meat as juicy and tender as a summer’s peach. This isn’t just a recipe; it’s a blueprint, a masterclass in culinary physics and flavour alchemy, presented with the precision and clarity you’d expect from a well-researched academic paper, but with the warmth of a good friend sharing their secret.
Before we delve into the practical steps, it’s crucial to understand the fundamental principles that govern crispiness. Think of it as laying the groundwork for a sturdy building; without a solid understanding of the foundations, the structure is likely to falter. Achieving that enviable crunch is a nuanced dance between moisture, fat, and heat.
Moisture Management: The Enemy of Crisp
Water is the arch-nemesis of crispiness. When heat is applied to anything with moisture, steam is generated. This steam attempts to escape, and in doing so, it can prevent the surface from drying out and becoming brittle. Imagine trying to toast a damp piece of bread; it will steam before it browns and crisps. With chicken skin, the goal is to drive off as much surface moisture as possible.
- Drying the Skin: This is perhaps the most critical, yet often overlooked, step. Patting the chicken legs dry with paper towels is non-negotiable. Furthermore, allowing the chicken to air-dry in the refrigerator for several hours, or even overnight, significantly enhances this effect. This process, known as dehydration, creates a drier surface that is primed for crisping.
- Preventing Steaming: Overcrowding the baking tray is a surefire way to trap steam. Give each chicken leg its space, like individual stars in a culinary constellation, allowing air to circulate freely around them. A single layer is paramount.
Fat Rendition: The Lubricant of Flavour and Texture
Chicken skin is a rich source of fat. When subjected to heat, this fat renders, meaning it melts and drains away. This rendering process is vital for two reasons:
- Crispness Enhancement: As the fat renders, the remaining protein structure of the skin becomes thinner and more delicate, making it more susceptible to crisping. The rendered fat also helps to conduct heat evenly across the surface.
- Flavour Development: The Maillard reaction, a chemical process responsible for browning and flavour development, is greatly enhanced by the presence of fat and high heat. This reaction creates those complex, savoury notes and the alluring golden-brown hue we associate with perfectly cooked chicken.
Heat Application: The Catalyst for Transformation
Consistent and appropriate heat is the engine that drives the crisping process. Too low, and the chicken will stew in its own juices; too high, and the exterior will burn before the interior is cooked through.
- High Initial Heat: Many recipes advocate for a high initial blast of heat – a culinary embrace that kick-starts the rendering process and quickly dries the skin. Think of it as a chef’s quick, intense handshake before a long conversation.
- Lower Sustained Heat: Following the initial high heat, a reduction in temperature allows the chicken to cook through gently without over-browning the exterior. This ensures the internal temperature reaches a safe point (74°C or 165°F) while the skin continues to crisp.
Ingredient Selection: Crafting the Canvas for Culinary Art
The quality of your raw materials directly impacts the final masterpiece. While the techniques are universal, starting with good ingredients streamlines the process and elevates the outcome.
Choosing the Right Chicken Legs
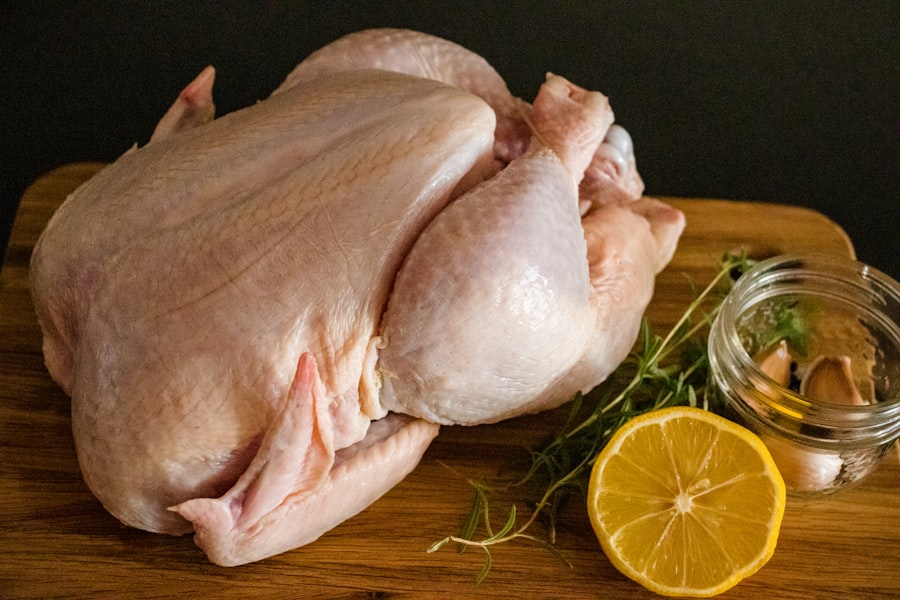
Opt for skin-on, bone-in chicken legs (drumsticks and/or thighs). The bone helps to conduct heat, resulting in more even cooking, and the skin, of course, is our primary focus for crispness.
- Freshness Matters: Always choose fresh chicken. While frozen chicken can be used, ensure it is thoroughly defrosted in the refrigerator before preparation. Residual moisture from defrosting can hinder crisping.
- Uniform Size: If possible, select chicken legs of approximately equal size. This ensures they cook at a similar rate, preventing some from drying out while others are still undercooked.
The Power of the Rub: Flavour, Enhance, Protect
A well-crafted rub does more than just add flavour; it contributes to the crispness and overall succulence of the chicken. Think of it as an artist’s primer – preparing the canvas for the vibrant oils.
- Salt: The Unsung Hero: Salt is paramount. It draws moisture from the skin through osmosis, further aiding the drying process, and it penetrates the meat, seasoning it from within. A generous, even application is crucial. Some culinary experts advocate for dry brining, where salt is applied hours or even a day in advance, allowing it to work its magic.
- Baking Powder: The Secret Weapon: A small amount of baking powder (not baking soda!) mixed into your rub is a game-changer. It increases the pH of the chicken skin, allowing for expedited browning and a more pronounced crispness. Furthermore, it creates tiny air bubbles, resulting in a lighter, more delicate crunch, almost like a microscopic soufflé on the skin.
- Spices and Herbs: Beyond salt and baking powder, your choice of spices and herbs is where you can truly dictate the flavour profile. Paprika (smoked or sweet), garlic powder, onion powder, black pepper, and dried thyme are classic additions. Feel free to experiment with your culinary palette; a touch of cayenne for heat, ground cumin for an earthy note, or even a hint of dried rosemary can transform the experience.
The Methodical Approach: Step-by-Step Towards Perfection
With our scientific understanding and premium ingredients in hand, let’s now meticulously construct our path to crispy chicken enlightenment. Each step is a deliberate brushstroke in this culinary creation.
Preparation: Setting the Stage for Success
This initial phase is where meticulous attention to detail pays dividends. It prevents many common pitfalls and lays the groundwork for impeccable results.
- Drying, Drying, Drying: As previously emphasised, pat each chicken leg thoroughly dry with paper towels. Get into every nook and cranny. For optimal results, place the dried chicken legs on a wire rack set over a baking sheet, uncovered, in the refrigerator for at least 4 hours, or preferably overnight. This process, akin to a slow-motion air current, gently draws out surface moisture.
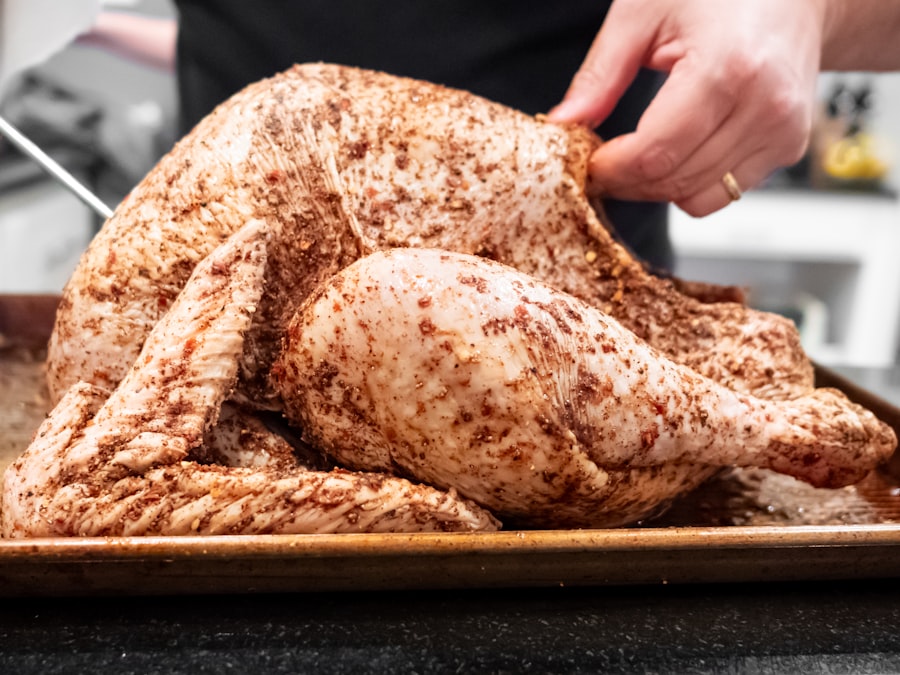
- The Rub Application: In a small bowl, combine your chosen spices, including the crucial salt and baking powder. Evenly coat each chicken leg with the rub. Massage it in, ensuring every inch of skin is covered. Don’t be shy; aim for a light, even dusting rather than a thick paste.
- Preheating the Oven: This is not merely a suggestion; it’s a command. Preheat your oven to a scorching 220°C (425°F). A properly preheated oven provides the intense, immediate heat needed to jump-start the crisping process.
The Baking Process: From Raw to Radiant
This is where the magic truly unfolds, as the sustained heat transforms the humble chicken leg into a culinary marvel. Think of it as the kiln firing a delicate pottery piece.
- Arrangement on the Rack: Place the seasoned chicken legs on a wire rack set within a baking sheet. The wire rack is vital as it allows air to circulate around the entire surface of the chicken, preventing the bottom from becoming soggy. Ensure there is ample space between each leg; imagine they need their own personal bubble of heat.
- Initial High-Heat Blast: Bake the chicken legs at 220°C (425°F) for 20-25 minutes. During this phase, you should observe significant rendering of fat and the skin beginning to brown and blister. This high heat is the initial shockwave that shatters the bonds of moisture.
- Temperature Reduction and Continued Baking: After the initial high-heat period, reduce the oven temperature to 190°C (375°F). Continue baking for another 25-35 minutes, or until the internal temperature of the thickest part of the chicken (avoiding the bone) reaches 74°C (165°F) when measured with a reliable meat thermometer. This lower temperature ensures the chicken cooks through without burning the skin, allowing for that sustained crisping.
Advanced Techniques and Troubleshooting: Polishing Your Culinary Crown
Even with the best intentions and the most precise instructions, sometimes culinary anomalies occur. Here are some sophisticated tweaks and troubleshooting tips to ensure consistent success.
Achieving Uniform Crispness: The Art of the Turn
While a wire rack significantly aids in circulation, occasionally one side of the chicken will crisp more effectively than the other.
- Strategic Flipping: Approximately halfway through the lower-temperature baking phase, you can carefully flip the chicken legs. This ensures both sides receive even heat exposure and crisp up uniformly. Use tongs, not a fork, to avoid piercing the skin and releasing precious juices.
Dealing with Stubborn Skin: When the Crunch is Eluding You
Occasionally, despite your best efforts, sections of the chicken skin might remain less crisp than desired. This is where a small, targeted intervention can make all the difference.
- The Broiler Booster: If, after the chicken is cooked through, the skin isn’t quite as crisp as you’d like, you can employ the broiler (grill in British English). Place the chicken back in the oven, under the preheated broiler, for 2-5 minutes, keeping a vigilant eye on it. The broiler provides intense, direct top-down heat, perfect for achieving that final golden-brown, shattering crispness. Be very careful, though; the line between perfectly crisp and burnt is incredibly fine under the broiler’s intense gaze.
Resting: The Unsung Hero of Juiciness
Just as a marathon runner needs to cool down, cooked meat needs to rest. This step is non-negotiable for juicy, tender chicken.
- Post-Bake Repose: Once the chicken legs are cooked to temperature, remove them from the oven and transfer them to a clean cutting board or platter. Tent them loosely with foil (do not tightly wrap, as this will steam the skin and compromise crispness) and allow them to rest for 5-10 minutes. This resting period allows the muscle fibres to relax and reabsorb the juices that have migrated to the centre during cooking, resulting in significantly juicier meat.
Serving Suggestions: Completing the Culinary Symphony
The ultimate crispy baked chicken leg is a star in its own right, but every star shines brighter with an expertly curated supporting cast.
Complementary Sides for a Balanced Meal
Just as a well-composed piece of music has multiple instruments, a complete meal benefits from diverse components.
- Roasted Vegetables: Roasting vegetables alongside the chicken, or separately, creates a harmonious flavour profile. Potatoes, carrots, parsnips, broccoli, or asparagus tossed with olive oil, salt, and pepper make excellent companions.
- Fresh Salads: A crisp green salad with a light vinaigrette provides a refreshing counterpoint to the richness of the chicken.
- Grains and Pulses: Quinoa, rice, or couscous can absorb the delicious pan drippings and add substance to the meal.
- Sauces (Optional): While these chicken legs are fantastic on their own, a simple pan gravy made from the rendered drippings, or a fresh herb sauce like chimichurri, can elevate the experience further for those who appreciate an additional layer of flavour.
Garnishing for Visual Appeal
Presentation is often the first bite, and a touch of garnish can transform a plate from merely food to an inviting culinary display.
- Fresh Herbs: A sprinkle of freshly chopped parsley, chives, or thyme adds a vibrant splash of colour and a burst of herbaceous aroma.
- Lemon Wedges: A squeeze of fresh lemon juice just before serving brightens the flavours and adds a delightful tang that cuts through the richness.
In conclusion, achieving the ultimate crispy baked chicken legs is not a matter of luck, but of understanding and meticulous execution. By embracing the science behind moisture management, fat rendition, and heat application, and by paying close attention to the details in preparation and cooking, you can consistently produce chicken that is a joy to behold and an absolute delight to devour. This journey from raw ingredient to culinary triumph is a testament to the power of knowledge, precision, and a genuine passion for good food. So go forth, dear reader, armed with this comprehensive guide, and prepare to elevate your chicken game to an unprecedented level of crispy perfection. Your taste buds, and indeed your dinner guests, will thank you.
FAQs
What are the best ways to prepare chicken legs for cooking?
Chicken legs can be prepared by marinating, seasoning with herbs and spices, or simply seasoning with salt and pepper. It’s important to pat them dry before cooking to ensure crispy skin.
How long should chicken legs be cooked to ensure they are safe to eat?
Chicken legs should be cooked until they reach an internal temperature of 75°C (165°F). This usually takes about 35-45 minutes in the oven at 200°C (fan 180°C), depending on the size of the legs.
Can chicken legs be cooked using different methods?
Yes, chicken legs can be roasted, grilled, baked, slow-cooked, or fried. Each method offers a different texture and flavour, allowing for versatile recipes.
Is it necessary to remove the skin from chicken legs before cooking?
Removing the skin is optional. Keeping the skin on helps retain moisture and adds flavour, especially when roasting or grilling. However, removing the skin can reduce fat content for a leaner dish.
What are some common side dishes to serve with chicken legs?
Popular side dishes include roasted vegetables, mashed potatoes, rice, salads, or steamed greens. The choice depends on the flavour profile of the chicken recipe used.