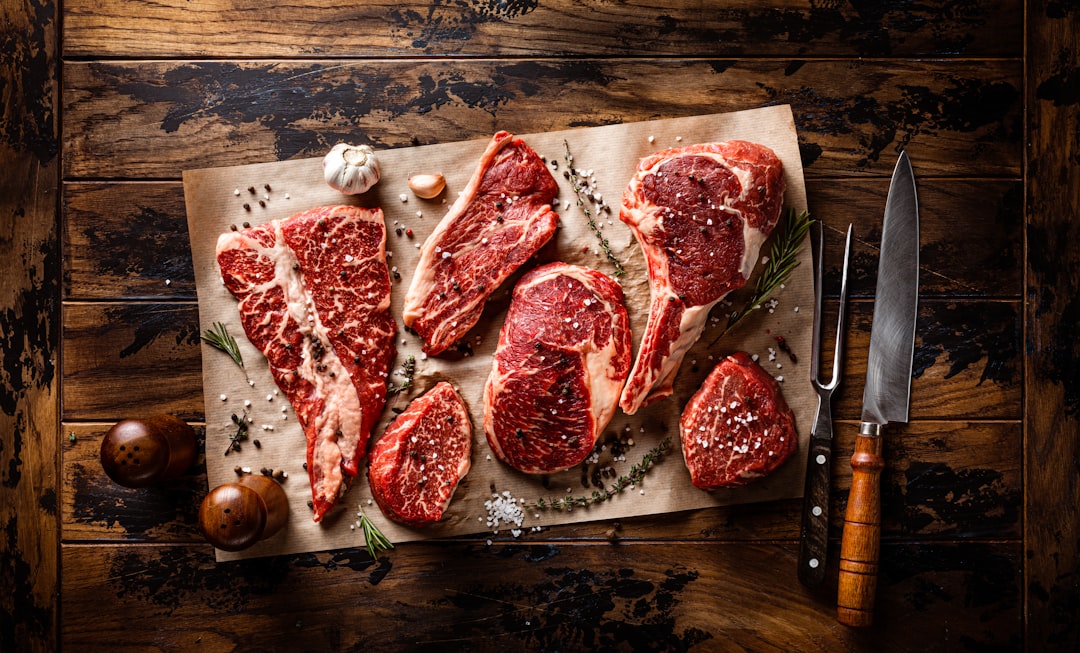
Storing fresh meat correctly at home is crucial for both food safety and ensuring you get the best flavour and texture from your purchases. As a UK-based SEO expert with a passion for good food, I’ve seen firsthand how a few simple steps can make a world of difference. Forget fancy equipment; it’s all about understanding the basics and being a little organised. This guide will walk you through everything you need to know, from unpacking your butcher’s haul to getting the most out of your fridge and freezer.
When you collect your fresh meat from the butcher, it’s a beautiful thing. Whether it’s a perfectly aged steak, a joint for Sunday roast, or some mince for a mid-week meal, it’s at its peak. However, the journey home and the subsequent storage are where many people unwittingly compromise its quality and safety. It’s not complicated, but it does require a little attention to detail from the get-go.
Speed is of the Essence: Minimising Time at Room Temperature
The moment meat leaves the controlled environment of the butcher’s counter, it begins a race against time, particularly when it comes to temperature. Bacteria, which are naturally present on raw meat, multiply rapidly in the ‘danger zone’ – the temperature range between 5°C and 60°C. Your priority the second you step out of the shop should be to get that meat back to a suitably cool environment.
From Shop to Fridge: The Emergency Dash
Think of the journey home as a mini-mission. If your butcher wraps your meat in paper, this is often a temporary measure for transport and not ideal for long-term storage. The less time your meat spends out of refrigeration, the better. Ideally, this should be no more than 30 minutes, especially on warmer days. If you’re making a longer journey, or the weather is particularly warm, consider using a cool bag with a few ice packs – a simple but effective solution that many of us overlook.
The ‘Cool Bag’ Strategy: A Lifesaver for Longer Trips
Investing in a decent reusable cool bag is one of the most practical things any home cook can do. It’s not just for the weekly shop; it’s a vital tool for transporting meat safely from the butcher, especially if you live a little distance away or are popping to the shop before other errands. Ensure your meat is well-packed inside, ideally with ice packs if your journey is going to be extended. This simple step significantly reduces the risk of bacterial growth during transit.
Unpacking and Initial Inspection: What to Look For
Once you’re home, don’t just shove the packaging straight into the fridge. Take a moment to assess what you’ve bought and how it’s presented. This initial inspection can highlight potential issues and inform your storage decisions.
Checking the Packaging: Secure and Intact?
Most prime cuts from a good butcher will be well-wrapped, often in butcher’s paper or vacuum-sealed. Check that the packaging is intact. If it’s a plastic tray with cling film, ensure the film is taut and hasn’t come loose, which could allow air to get in and compromise freshness. For vacuum-sealed items, look for any signs of the seal being broken or the bag being inflated, which could indicate spoilage.
The ‘Smell Test’ (with Caution): A Preliminary Indicator
While not always definitive, a quick, cautious sniff can sometimes be a useful, albeit preliminary, indicator. Fresh meat should generally have a mild, slightly metallic or earthy smell. If you detect any strong, sour, ammonia-like, or generally unpleasant odours, it’s a strong signal that the meat has begun to spoil. However, remember that some people have a more sensitive sense of smell, and not all early spoilage is immediately obvious through odour. Always be guided by other factors, like appearance and texture, too.
Visual Cues: Colour and Texture
Raw meat colour can vary depending on the cut and the presence of oxygen. Beef that’s a bright cherry red is usually a good sign, though it can darken slightly when exposed to air – this is a natural process. Lamb is generally a pinkish-red, and pork is a pale pink. If you see any greyish or greenish discolouration, especially in patches, this is a red flag. Similarly, the texture should be firm and slightly moist. If it feels slimy, sticky, or excessively wet, it’s best to err on the side of caution.
Fridge Fundamentals: Optimising Your Refrigerator for Fresh Meat
The refrigerator is your primary ally in keeping fresh meat safe for immediate use. However, not all parts of the fridge are created equal when it comes to temperature consistency. Understanding these nuances can help you store your meat optimally.
The Correct Temperature: Your Fridge’s Sweet Spot
The ideal temperature for a domestic refrigerator, according to the Food Standards Agency (FSA) in the UK, is between 0°C and 5°C. Consistently maintaining this range is crucial for slowing down bacterial growth. Anything warmer than 5°C begins to enter that dangerous zone where bacteria can multiply much more rapidly.
Checking Your Fridge’s Thermometer: Is it Accurate?
Many people assume their fridge is at the correct temperature, but it’s worth checking. You can buy an inexpensive fridge thermometer to place inside. Check it regularly, especially after stocking up or if you’ve had the door open for a while. Adjust your fridge settings accordingly. Modern fridges often have digital displays, but even these can sometimes be slightly off.
Understanding Fridge Zones: Cold Spots and Warm Spots
Refrigerators aren’t uniformly cold. The shelves at the bottom, especially towards the back, are typically the coldest parts. Warmer air rises, so the top shelves and the door shelves tend to be warmer. This is why meat should ideally be stored at the bottom of the fridge.
Strategic Placement: Where to Put Your Meat
This is perhaps the most critical aspect of fridge storage for raw meat. Proper placement isn’t just about convenience; it’s about preventing cross-contamination and ensuring consistent cooling.
The Bottom Shelf: The Golden Rule
This cannot be stressed enough: always store raw meat on the bottom shelf of your refrigerator. This is the coldest part of the fridge and, crucially, it acts as a barrier. If any juices were to leak from the packaging (and we’ll discuss preventing this shortly), they would drip downwards, away from ready-to-eat foods stored below it, rather than contaminating them. This is a fundamental food hygiene practice.
Using Trays and Containers: The Double-Protection Method
Even with careful packaging, there’s always a risk of leaks. To provide an extra layer of protection, place your pre-packaged raw meat on a tray or in a shallow, sealable container on the bottom shelf. This will catch any drips and prevent them from spreading. Old plastic takeaway containers, baking trays, or dedicated fridge storage boxes work perfectly well.
Packaging for the Fridge: Maintaining Air-Tight Perfection
Once you’ve brought your meat home, it’s often best to repackage it for optimal fridge storage. This might involve transferring it from butcher’s paper or sealing it more effectively within its original packaging.
Minimising Air Exposure: The Enemies of Freshness
Air is a major contributor to the degradation of fresh meat. It can dry out the surface, allow oxidation to occur (leading to changes in colour and flavour), and encourage the growth of certain microbes. The aim is to keep your meat as sealed and protected as possible.
Using Cling Film and Foil: The Traditional Approach
Once unpackaged from any initial paper wrapping, you can re-wrap cuts of meat tightly in cling film. Ensure there are no air pockets. For larger joints, aluminium foil can also be used, either over the cling film or as an alternative. This double-wrapping provides a good barrier against air and moisture loss. Make sure the wrapping is snug, like a drum skin.
Vacuum Sealing for Extended Fridge Life: The Modern Marvel
If you have a vacuum sealer, this is an excellent tool for storing fresh meat in the fridge. Removing the air significantly extends the shelf life of the meat while keeping it fresh and preventing freezer burn if you decide to freeze it later. Vacuum-sealed meat is also less prone to accidental leaks.
Freezer Facts: Preserving Meat for the Long Haul

The freezer is your best friend when you’ve bought more meat than you can realistically consume within a few days or when you want to take advantage of bulk offers. However, proper freezing techniques are essential to prevent quality degradation and ensure safety.
The Importance of a Deep Freeze: Reaching Sub-Zero Temperatures
To effectively preserve meat, your freezer needs to be consistently at or below -18°C. This temperature is cold enough to stop bacterial growth entirely, although it doesn’t kill bacteria. It essentially puts them into a dormant state.
Checking Your Freezer’s Temperature: A Crucial Step
Just like your fridge, your freezer’s temperature can fluctuate. Invest in a freezer thermometer to ensure it’s consistently at -18°C or colder. This is vital for long-term storage. A freezer that’s too warm will lead to poorer quality meat and potentially a shorter shelf-life.
Avoiding Frost Build-Up: Keeping it Efficient
Excessive frost build-up in your freezer can reduce its efficiency, making it work harder and potentially leading to inconsistent temperatures. Regularly defrost your freezer if it’s a manual defrost model. If you have a frost-free freezer, ensure the door seals are clean and intact to prevent moisture from entering.
Packaging for Freezing: Battling Freezer Burn
Freezer burn is the dehydration of frozen food, resulting in pale, leathery patches and a diminished flavour and texture. It’s caused by exposure to air. Effective packaging is your primary defence against it.
Airtight is Key (Again!): The Ultimate Protection Against Air
This principle, which you’ve learned for the fridge, is even more critical for the freezer. The goal is to create a complete barrier between the meat and the cold, dry air inside the freezer.
Freezer Bags: Thicker is Better
If you’re using standard freezer bags, double-bagging is highly recommended. Squeeze out as much air as possible with each bag before sealing. Look for bags specifically designed for freezing, as these are generally thicker and more durable than standard food bags.
Cling Film and Foil: The Double Whammy
For cuts that don’t fit neatly into bags, or for an extra layer of protection, wrapping tightly in cling film first, then in a layer of aluminium foil, is a classic and effective method to prevent freezer burn. Ensure there are no gaps or loose edges.
Vacuum Sealing: The Superior Freezing Method
As mentioned before, vacuum sealing is arguably the gold standard for freezing meat. By removing all the air, you create an excellent barrier that dramatically reduces the risk of freezer burn and preserves quality for longer. It also allows for more compact storage.
Labelling and Dating: Keeping Track of Your Haul
It might sound mundane, but labelling and dating your frozen meat is an absolutely essential step. Without it, you risk ending up with mysterious bags of unknown origin at the back of your freezer, unsure of their safety or quality.
The ‘When’ and ‘What’: Essential Information
Clearly label each package with the type of meat and the date it was frozen. Use a permanent marker that won’t smudge or fade. This information will be invaluable when you’re planning your meals and need to select something from the freezer.
Using the Oldest First: Employing FIFO
Apply the ‘First In, First Out’ (FIFO) principle. When you open your freezer, you should be able to easily see and access the oldest items first. This ensures that you use your meat before it has been in the freezer for an extended period, maintaining the best possible quality.
Storing Specific Cuts: Nuances for Different Meats

While the general principles of refrigeration and freezing apply to all raw meat, there are a few specific considerations for different types of cuts and meats.
Mince and Small Pieces: High Risk, Short Shelf Life
Mince, whether beef, lamb, or pork, has a much larger surface area compared to whole cuts. This makes it more susceptible to bacterial contamination and spoilage. Therefore, it has a significantly shorter shelf life in the fridge.
Fridge Storage for Mince: Use it Quickly!
Freshly purchased mince from a good butcher should ideally be cooked within two days if stored in the fridge. If you’ve bought it, and particularly if it’s pre-packed from a supermarket, check the use-by date meticulously. If you can’t cook it within this timeframe, freeze it immediately.
Freezing Mince: Portion It Out
When freezing mince, it’s best to portion it into amounts you’re likely to use in a single meal. This prevents you from having to defrost a large block and then refreeze the rest, which is not advisable for food safety reasons. Flattening the mince into a disc shape in the bag before freezing allows it to defrost more quickly and evenly.
Joints and Larger Cuts: Longer Fridge Life, Careful Wrapping
Larger cuts, such as roasting joints of beef, lamb, or pork, tend to have a slightly longer shelf life in the fridge compared to mince, as they have less surface area exposed to the air. However, proper wrapping is still paramount.
Fridge Storage for Roasts: Two to Three Days Generally
A good quality roasting joint from your butcher, if kept properly wrapped on the bottom shelf of your fridge, should be safe to cook and eat within two to three days. Always check for any signs of spoilage before cooking. If in doubt, freeze it.
Freezing Large Joints: Consider Slicing First
You can freeze large joints whole, but they take a long time to defrost. For practicality, consider slicing or cubing larger joints before freezing them. This will make them much easier to thaw and use for various dishes, from quick stir-fries to stews.
Sausages and Bacon: Cured and Prepared Meats
Processed meats like sausages and bacon have had salt and often other curing agents added, which act as preservatives. This generally gives them a longer shelf life than fresh, unprocessed meat, but they still require careful storage.
Checking Packaging on Arrival: Seal and Date
Always check the packaging of sausages and bacon when you buy them. Ensure the seal is intact and that there’s ample time before the ‘use by’ date. If you’ve bought unpacked sausages or bacon from a butcher, treat them like fresh meat and store them appropriately.
Fridge Storage for Sausages and Bacon: Follow the ‘Use By’
Once opened, sausages and bacon should typically be consumed within a few days, usually following the ‘use by’ date on the packaging. Keep them in their original packaging or in a sealed container on the bottom shelf of the fridge.
Freezing Sausages and Bacon: A Common Practice
Both sausages and bacon freeze very well. Wrap them tightly to prevent freezer burn. If freezing sausages, it’s useful to separate them into portions. Bacon can be frozen in its original packaging or divided into smaller portions. Remember to label and date them.
Defrosting Safely: The Final Crucial Step
Once you’ve stored your meat, the time will come to defrost it. This is another stage where food safety is paramount. Rushing the defrosting process or doing it incorrectly can still lead to problems.
The Safest Defrosting Methods: Slow and Steady Wins the Race
The safest way to defrost raw meat is to do it slowly and at a controlled temperature. This minimises the time the meat spends in the danger zone where bacteria can multiply.
In the Refrigerator: The Overnight Champion
The best and safest method for defrosting meat is to leave it in the refrigerator overnight. If it’s a large joint, it might take significantly longer, potentially 24 hours or more. Ensure it’s placed in a container or on a tray to catch any drips. This is the most controlled method and maintains the best quality.
In Cold Water: A Quicker Alternative (with Conditions)
For quicker defrosting, you can submerge sealed packages of meat in cold water. The key here is that the meat must be in a leak-proof bag, and the water must be changed regularly (every 30 minutes) to keep it cold. This is a faster method than refrigeration, especially for smaller cuts, but requires your attention. Do not use hot water, as this will start to cook the outer layers of the meat while the inside remains frozen, creating a breeding ground for bacteria.
What NOT to Do: Avoiding Risky Defrosting Habits
There are certain defrosting methods that are best avoided due to the increased risk of bacterial growth.
At Room Temperature: The Danger Zone Disaster
Never defrost meat at room temperature on the kitchen counter. The outer layers of the meat will quickly warm up into the danger zone (5°C-60°C), allowing bacteria to multiply rapidly, even if the inside is still frozen. This is a significant food safety risk and can lead to food poisoning.
Using the Microwave: Handle with Care
While microwaves have defrost settings, this method can be inconsistent. It can partially cook the edges of the meat while leaving the centre frozen, which can create a food safety issue. If you do use the microwave to defrost, cook the meat immediately afterwards, as some bacteria may have begun to multiply during the defrosting process.
Cooking Immediately After Defrosting: The Golden Rule
Once meat has been defrosted, it should ideally be cooked as soon as possible. This is especially true for meat that has been defrosted in cold water or the microwave. Meat defrosted in the refrigerator can usually be kept for another day or so, but cooking it promptly is always the safest bet. Remember, defrosting doesn’t kill bacteria; it just slows their growth. Once thawed, they can become active again.
By following these straightforward tips, you can ensure that your fresh meat stays safe, tastes delicious, and you get the most value from your purchases from your trusted local butcher or favourite shop. It’s about respecting the food and understanding the simple science behind keeping it at its best. Bon appétit!