Making a truly exceptional homemade burger is a culinary journey worth embarking on, and when you start with the finest butcher’s mince, you’re already halfway to burger greatness. Forget those pre-packaged patties that often lack flavour and texture; investing in quality mince from your local butcher opens up a world of delicious possibilities. As a UK-based SEO and content creator, I’m here to guide you through each step, ensuring your homemade burgers are not just good, but genuinely spectacular, using that superior butcher’s mince as your foundation.
The secret to a perfect burger often lies in the quality of the meat. Your local butcher is an invaluable resource, offering expertise and often a superior product to supermarket alternatives. When you’re aiming for that truly memorable burger experience, the mince selection is paramount.
What to Ask Your Butcher
Don’t be shy when you visit your butcher. They are there to help you make informed choices. The more you communicate your intentions, the better advice they can offer.
Fat Content is King
The fat content of your mince is arguably the most critical factor in achieving a juicy and flavourful burger. Too little fat, and your burgers will be dry and crumbly. Too much, and they can become greasy and overwhelming.
- The Ideal Ratio: For most burger enthusiasts, a fat-to-lean ratio of around 20% fat is the sweet spot. This means for every 80% of lean meat, there’s 20% fat. This balance ensures moisture retention during cooking and provides that satisfying richness.
- Discussing Your Needs: Clearly state that you’re making burgers. Your butcher will likely have specific mince blends designed for this purpose, often around the 20-25% fat mark. If they offer different cuts, ask about the fat content of each and how it might perform in a burger. For instance, a mince made from chuck and brisket will typically have a good fat content and excellent flavour.
- Avoiding Leaner Options: While healthier options like 5% or 10% fat mince might seem appealing, they are generally unsuitable for burgers as they lack the essential fat to hold them together and keep them moist. You’ll end up with dry, potentially tough patties that are difficult to shape and cook.
The Cut Matters
While a general “burger mince” is often available, you can elevate your burger by understanding the cuts that make up the blend.
- Chuck (or Blade): This is a fantastic cut for burgers. It has a good amount of marbling (intramuscular fat) which contributes to tenderness and flavour. It’s also relatively inexpensive.
- Brisket: A tougher cut that benefits from slow cooking, brisket also has excellent flavour and a good fat content when minced. A blend including brisket adds depth and a slightly more complex taste to your burger.
- Short Rib: If you have access to short rib mince, it’s a real treat. It’s incredibly rich and flavourful due to its high fat content and connective tissues.
- Asking for Specific Blends: A good butcher might be able to grind a custom blend for you. If they have access to different cuts, ask if they can create a mix of chuck and brisket, for example. This offers a fantastic balance of flavour and texture.
Freshness and Colour
The appearance of the mince can tell you a lot.
- Vibrant Red: Fresh beef mince should have a bright, cherry-red colour. A dull, brownish hue can indicate it’s been sitting around for too long or has been exposed to air excessively.
- Texture: The mince should look coarse and slightly clumpy, not finely ground into a paste. This coarser grind will allow for better texture in your finished burger.
- Smell: Trust your nose. Fresh mince should have a mild, slightly sweet smell. Any sour or unpleasant odour is a clear sign to avoid it.
How to Present Your Mince
Once you’ve chosen your mince, how it’s prepared and presented can make a subtle difference.
“Loose” Mince vs. Pre-formed Patties
Always opt for “loose” mince that you can shape yourself. Your butcher might offer to form it into patties for you, but it’s generally better to do this at home.
- Control Over Density: When you shape the patties yourself, you have complete control over how tightly you pack the mince. Overworking or over-compressing the meat can lead to tough burgers.
- Minimising Oxidation: Once minced, meat begins to oxidise. The less it’s handled and the quicker it’s cooked after mincing, the better. Pre-formed patties, especially those wrapped in plastic, may have undergone more handling and exposure.
Getting it Home
Transporting your mince needs a little care.
- Keep it Cold: Ensure your butcher wraps the mince well, and preferably place it in an insulated bag with a cool pack for the journey home, especially if it’s a warm day or you have a long drive.
- Refrigerate Immediately: As soon as you get home, put the mince in the coldest part of your refrigerator.
The Art of Forming the Perfect Patty
Shaping your burger patties is where you transform that delicious mince into its final, cookable form. This process requires a gentle touch and a few key techniques to ensure your burgers are juicy, hold together, and cook evenly.
Handling the Mince with Care
The golden rule when forming burger patties is to be as gentle as possible. Overworking the mince can develop the proteins too much, resulting in dense, tough burgers that lack that desirable crumbly texture.
- Minimal Manipulation: Think of it as bringing the mince together, not kneading dough. Use your hands to lightly gather the mince and form it into a ball.
- Avoid Squeezing: Resist the urge to squeeze and pack the mince tightly. A light touch is all that’s needed to achieve a patty that holds its shape.
Portioning and Weight
Consistency in size and weight is important for even cooking, especially if you’re cooking multiple burgers at once.
- Standard Portion Size: For a substantial burger, aim for patties that are around 150-200 grams each. This size will cook through nicely without shrinking too much.
- Using a Scale: If precision is your aim, a kitchen scale is your best friend. Weigh out portions of mince before you start forming. This guarantees that all your burgers will cook at the same rate, preventing some from being overcooked while others are undercooked.
- Adjusting for Preference: If you prefer a smaller burger or are making sliders, adjust the weight accordingly. However, remember that smaller, thinner patties will cook much faster and can dry out more easily.
Shaping Techniques for Success
The shape and thickness of your patty contribute significantly to its cooking outcome and overall eating experience.
- The Classic Disc: Form a loosely packed ball of mince, then gently flatten it with the palm of your hand or your fingertips. Aim for a disc that is roughly 1.5-2 cm thick.
- The Indentation: This is a crucial step often overlooked. Before cooking, press a small indentation into the centre of each patty with your thumb. This prevents the burger from puffing up into a domed shape during cooking, ensuring it remains relatively flat and cooks more evenly.
- Uniformity is Key: Try to make all your patties the same thickness and diameter for consistent results on the grill or in the pan. If your patties are slightly messy around the edges, that’s perfectly fine. It’s a sign of a less processed patty.
Resting and Chilling Your Patties
Allowing your formed patties to rest and chill can improve their structural integrity and prevent them from falling apart during cooking.
- The Chill Factor: Once shaped, place your patties on a plate or baking tray lined with greaseproof paper. Cover them loosely with cling film and refrigerate for at least 30 minutes, or ideally 1-2 hours.
- Benefits of Chilling: Chilling helps the fat to solidify again, which helps the patty to hold its shape better when it meets the heat. It also allows the meat to relax, contributing to a more tender result.
- Freezing for Later: If you’ve made a larger batch, you can freeze your chilled patties. Place a piece of greaseproof paper between each one to prevent sticking, then wrap them individually or in groups in freezer bags or cling film. Thaw them in the refrigerator overnight before cooking.
The Seasoning Strategy: Flavour Without Overcomplication
When you start with high-quality butcher’s mince, the temptation to over-season can be strong. However, the beauty of excellent meat is its inherent flavour. The goal of seasoning is to enhance, not mask, what’s already there.
The Simplicity of Salt and Pepper
For many, the ultimate burger seasoning is incredibly straightforward. This highlights the true taste of the beef.
- Coarse Sea Salt: The star of the show. Use a good quality sea salt or kosher salt. The larger crystals adhere well to the surface of the patty and provide a satisfying crunch.
- Freshly Cracked Black Pepper: Essential for a hint of warmth and spice. Grind it fresh just before you’re ready to season. Pre-ground pepper loses its pungency very quickly.
- When to Season: This is a point of debate, but for the best crust, season your patties liberally on both sides just before they hit the heat. Salting too far in advance can draw moisture out of the mince, potentially leading to a slightly drier burger and a less effective sear.
Beyond the Basics: Subtle Additions
While salt and pepper are paramount, you might wish to introduce a touch more complexity. The key here is subtlety.
- Garlic Powder or Granules: A small amount can add a pleasant depth without being overpowering. Avoid fresh garlic, as its oils can cause problems when cooking and the flavour can be too intense.
- Onion Powder or Granules: Similar to garlic, onion powder offers a mellow, savoury note without the water content of fresh onions.
- A Pinch of Smoked Paprika: If you enjoy a hint of smokiness, a tiny pinch of smoked paprika can add an interesting dimension. Be very sparing, as it can easily dominate.
- Worcestershire Sauce (in moderation): A few dashes of Worcestershire sauce can add umami. However, add it sparingly to the mince itself when forming patties, or brush it on the exterior just before cooking. Too much can make the mince too wet.
What to Avoid Seasoning-Wise
Some ingredients, while delicious in other contexts, can be detrimental to your burger mince.
- Finely Chopped Onions or Garlic: The moisture content of fresh onions and garlic can break down the structure of the mince. They can also cause burgers to stick more easily and burn on the outside before cooking through. If you love onion and garlic in your burgers, consider caramelised onions or garlic aioli as a topping instead.
- Breadcrumbs or Egg (in most cases): Unless you’re making a specific type of burger that requires a binder (like a very lean mince that struggles to hold together or a European-style Frikadellen), avoid breadcrumbs and egg. These are common in meatloaf mixtures and will result in a burger with a meatloaf-like texture, which is not the goal for a classic butcher’s burger. Your 20% fat mince should bind itself perfectly.
- Over-Seasoning: As mentioned, the quality of your mince should shine. Don’t drown its natural flavour in a riot of spices.
The Seasoning Process
Here’s a quick guide to seasoning your patties:
- Form Your Patties: Gently shape your mince into your desired patty size and thickness, remembering the thumbprint.
- Season Just Before Cooking: Lay your patties out on a plate or board.
- Generous Salt and Pepper: Sprinkle both sides liberally with coarse sea salt and freshly cracked black pepper. Don’t be shy! This crust is crucial for flavour and texture.
- Optional Additions: If using other dry seasonings like garlic or onion powder, sprinkle them on now.
- Gentle Press: Lightly press the seasonings into the surface of the mince.
The Cooking Process: Achieving the Perfect Sear and Juiciness

This is where the magic happens. The cooking method, temperature, and timing are all critical for transforming your carefully prepared patties into succulent works of art. Whether you opt for the intense heat of a barbecue or the controlled environment of a griddle pan, the principles remain the same.
Choosing Your Cooking Method
Both the grill and the griddle pan offer excellent results, each with its own advantages.
Barbecue Brilliance
For that quintessential smoky flavour and attractive char marks, the barbecue is hard to beat.
- Preheating is Key: Ensure your barbecue is at a medium-high heat. Get the coals glowing or the gas burners hot before you place your burgers on the grates.
- Clean Grates: Clean the grill grates thoroughly to prevent sticking and that unpleasant burnt flavour. A good scrub with a wire brush is essential.
- Direct vs. Indirect Heat: For most burgers, direct heat is preferred for a good sear. However, for thicker patties, you might cook them over direct heat for the initial sear and then move them to a cooler, indirect heat zone to finish cooking through without burning.
- Lid Down: For thicker burgers, closing the lid of your barbecue helps to cook them through more evenly and creates a more oven-like environment.
Griddle Pan Mastery
A cast-iron griddle pan or a heavy-based frying pan on the hob can achieve fantastic results, replicating the searing power of a professional flat-top grill.
- Preheating is Crucial: Just like the barbecue, your griddle pan needs to be smoking hot before the burgers go on. Cast iron holds heat exceptionally well, so give it ample time to warm up.
- Fat for Searing: You will likely need to add a little high-smoke-point oil to the pan. Grapeseed, canola, or a light vegetable oil are good choices. A tiny amount of beef dripping or lard can also add incredible flavour.
- Crispy Edges: The flat surface of the griddle pan ensures excellent contact with the patty, promoting a beautiful, crispy crust all around.
The Importance of High Heat and Minimal Flipping
The secret to a great burger crust and a juicy interior lies in high heat and restraint.
- The Sear: High heat creates a Maillard reaction on the surface of the burger, developing those delicious brown, caramelised notes. Don’t be afraid of a good, aggressive sear.
- Resist the Urge to Flip: Patience is key. Let the burger cook undisturbed on the first side until a deep brown crust has formed. This usually takes 3-5 minutes depending on thickness and heat.
- One Flip Wonder: Flip the burger only once. Over-flipping can break down the crust you’ve worked to create and lead to a less juicy burger.
- Don’t Press Down: Resist the temptation to press down on the burgers with your spatula. This squeezes out all the delicious juices and fat, resulting in a dry burger.
Cooking Times and Doneness
Achieving your desired level of doneness is a matter of personal preference, but understanding cooking times is important.
- Temperature is King: The most accurate way to check for doneness is with a meat thermometer.
- Rare: 50-52°C (122-126°F) – very red, cool centre.
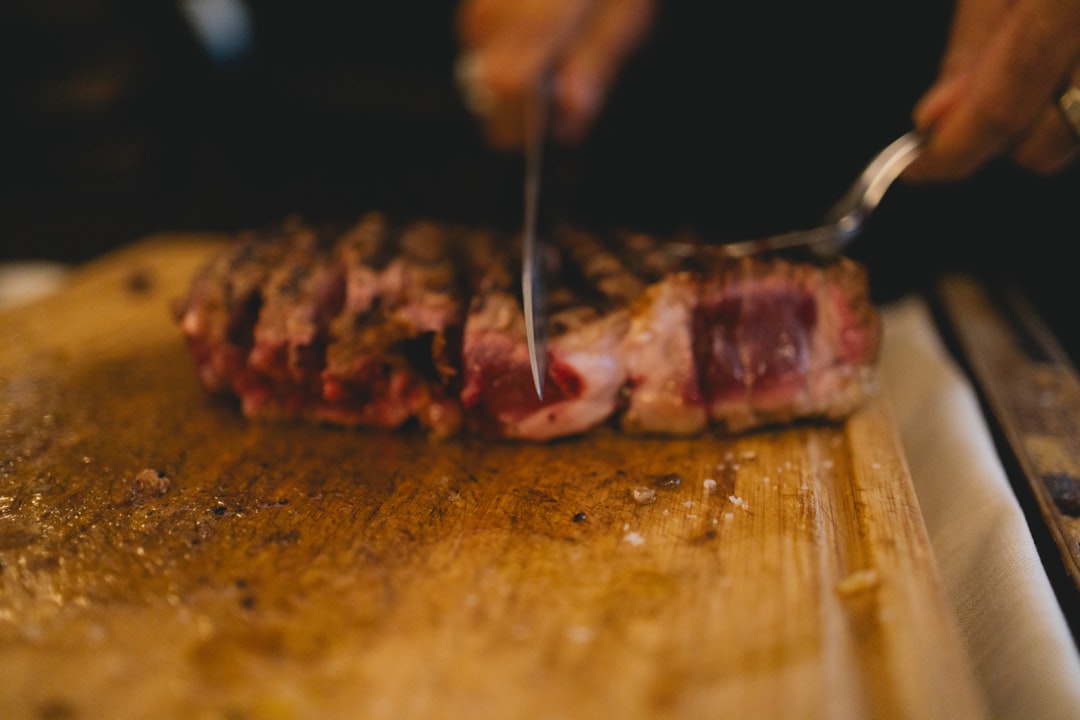
- Medium-Rare: 55-57°C (130-135°F) – red, warm centre. (Often considered ideal for burgers).
- Medium: 60-63°C (140-145°F) – pink, warm centre.
- Medium-Well: 65-68°C (150-155°F) – slightly pink centre.
- Well-Done: 70°C+ (160°F+) – no pink, cooked through. (Generally not recommended for quality beef mince).
- Estimating Times (for a 180g/6oz, 1.5-2cm thick patty on medium-high heat):
- Medium-Rare: Approximately 3-4 minutes per side.
- Medium: Approximately 4-5 minutes per side.
- Medium-Well: Approximately 5-6 minutes per side.
- Carry-over Cooking: Remember that burgers will continue to cook slightly after you remove them from the heat due to carry-over cooking. Aim to take them off at the lower end of your desired temperature range.
Resting Your Burgers
Just like a good steak, resting your burgers after cooking is a vital step that ensures maximum juiciness.
- The Importance of Rest: When meat cooks, the juices are pushed towards the centre. Resting allows these juices to redistribute throughout the patty, resulting in a more tender and moist burger.
- How to Rest: Transfer your cooked burgers to a clean plate or a piece of foil. Loosely tent them with foil (don’t wrap them tightly, as this will steam them and soften the crust).
- Resting Time: Allow your burgers to rest for 5-10 minutes before serving. This short period makes a significant difference.
Assembling Your Masterpiece: The Bun and Toppings
The final act in the burger-making drama is assembling your creation. While the patty is undoubtedly the star, the supporting cast of buns and toppings can elevate your burger from excellent to truly memorable. The key is balance and quality, mirroring the philosophy of using top-tier butcher’s mince.
The Humble, Yet Crucial, Bun
A burger bun is more than just a vehicle for the patty and toppings; it’s an integral part of the experience.
- Quality Matters: Just as you wouldn’t skimp on the mince, don’t settle for dry, insipid, mass-produced buns. Look for good quality brioche, potato buns, or a crusty artisan roll.
- Brioche Buns: These are a popular choice for a reason. Their slightly sweet, buttery flavour and soft, yet slightly firm, texture complement rich beef perfectly. They toast beautifully.
- Potato Buns: Known for their incredible softness and ability to absorb juices without disintegrating, potato buns are another excellent option.
- Crusty Rolls: For a more rustic feel, a lightly crusty sourdough or ciabatta roll can provide a satisfying chew and a good contrast to the soft patty.
- Toasting is Non-Negotiable: Always toast the inside of your buns. This creates a barrier that prevents them from becoming soggy from the burger’s juices and adds a lovely warmth and texture. A quick toast on the grill, under the grill (broiler), or in a dry frying pan works wonders.
The Art of Topping Selection
When it comes to toppings, think about flavour combinations and textures that will enhance, not overwhelm, your burger. The goal is synergy.
Classic Companions
These are the timeless pairings that have stood the test of time for good reason.
- Cheese: The quintessential burger topping.
- Melted Cheddar: A classic British favourite. Use a mature or extra mature cheddar for a sharp, tangy flavour.
- American Cheese (Sliced Processed): While perhaps less artisanally appealing, the superior meltability of American cheese makes it a favourite for achieving that gooey, draped-over-the-patty look.
- Monterey Jack: A milder, creamy cheese that melts beautifully.
- Swiss: Offers a nutty, slightly sweet flavour.
- Blue Cheese: For the adventurous, a strong blue cheese can add a pungent, complex element.
- Melting Technique: Add your cheese slices to the patty in the last minute or two of cooking, or place them on top of the burger on the grill/pan and cover them briefly to encourage melting.
- Lettuce: Provides a fresh, crisp counterpoint.
- Iceberg: Offers a satisfying crunch and watery coolness.
- Romaine: Has a firmer texture and slightly sweet flavour.
- Little Gem: A sweeter, more tender variety.
- Tomato: Adds acidity and a burst of freshness.
- Ripe Beef Tomatoes: Thick slices of ripe, flavourful beef tomatoes are ideal.
- Heirloom Tomatoes: If in season, these add a fantastic variety of colours and flavours.
- Onion: Offers a pungent bite.
- Raw Red Onion: Thinly sliced, raw red onion provides a sharp, slightly sweet crunch. Soaking them in cold water for 10 minutes can mellow their intensity.
- Caramelised Onions: Slow-cooked until deeply sweet and jammy, caramelised onions offer a rich, comforting flavour. This is a more labour-intensive but incredibly rewarding option.
- Pickled Red Onions: A tangier, more acidic alternative to raw red onion, offering a bright, refreshing element.
Sauces and Condiments
The glue that holds your burger together, both literally and figuratively.
- Mayonnaise: A classic base for many burger sauces.
- Ketchup: The undisputed king of tomato-based condiments. Opt for a good quality one.
- Mustard: Adds a sharp, spicy kick. Dijon, English, or American mustard all offer different profiles.
- Burger Sauce: A popular choice, often a mayonnaise-based sauce with ketchup, relish, and a hint of spice.
- Relish: Sweet pickle relish or a chunky tomato relish can add texture and a sweet tang.
- Chipotle Mayo: For a smoky, spicy kick.
- Aioli: Especially garlic aioli, can provide a rich, garlicky creaminess.
Layering for Success
The order in which you stack your burger matters.
- Bottom Bun: Toasted, foundation of your burger.
- Sauce/Spread: A generous spread of your chosen sauce or condiment.
- Lettuce: A bed for the patty, helping to absorb juices.
- Tomato: Slices of ripe tomato.
- The Patty: Your perfectly cooked, rested burger, topped with melted cheese.
- Onion/Pickles: Your chosen onion preparation or pickles.
- More Sauce/Condiment: Applied to the top bun.
- Top Bun: Toasted.
By treating each component with the care and attention it deserves, from the butcher’s mince to the final bun toast, you’ll be well on your way to creating a homemade burger that truly impresses. Enjoy the process and, most importantly, enjoy the magnificent result.